Saturday, December 31, 2011

Happy New Year!

This is one of the cards that we made during the Big Shot club this month.  I needed some cards for people who never got Christmas cards. (There were about six people on my list who didn't get a card....I just ran out of time!) If you look at the group of cards, mine is the boring one on the bottom left.  Everyone got very creative with their card!
The card was made by layering two cards together. Below are the dimensions for the card stock.

Silver - 8" x 4 1/4" scored at 5 1/2"
Night of Navy - 8" x 3 1/2" scored at 3 1/4"
Whisper White - 4" x 5 1/4", 4 1/2" x 3 1/4", 4" x 2 1/4", 3 1/4" x 3"

The numbers, from the stamp set Look Who's Turning, were stamped in Versa Mark and silver embossing powder and punched with the 3/4" circle punch.  The stars were cut using a Sizzix die.

Happy New Year!


Friday, December 30, 2011

A Sneak Peek!

This is a modified card from the new Occasions Mini catalog that begins on January 4th.  The heart was created using one of the new heart framelit dies.  The card is also spritzed with the new Blushing Bride color spritz.  Make sure you check back on the 4th to see the new catalog!   

Another Simple Card

During this busy season, I'm always looking for cards that don't take too much time to make. Well, my sister-in-law, Dawn, came up with this card.  She was over the other afternoon stamping a 3" x 3" version of this card and I told her we had to make it for the Big Shot Club.  Since her 3" x 3" version didn't use the Big Shot, we added an embossed butterfly to the 5 1/2" x 4 1/4" version!

You only need one color and black to make a card like this. The Melon Mambo flowers were stamped twice to make different shades of the color.

Wednesday, December 28, 2011

Technique Classes Starting in January

Would you like to learn different ways to use Stampin' Up! Products?  Starting in January, I will be offering  technique classes where you will learn how to do even more things with Stamping' Up! Products!

Each class will cost only $5.

At each class you will learn a different technique.  After practicing the technique, you will make one card and leave with samples that you will be able to use to create more cards on your own. 

Thursday, January 19th at 7:00 p.m. - Masking

Thursday, February 9th at 7:00 p.m. - Emboss Resist 

Email me to reserve your spot for a class!
SUstamper@verizon.net


Holiday Mini Carry Over Items

Click this link to see the Holiday Mini carry over items.  Some stamp sets usually carry over to the next catalog, but there aren't any on the list, so we'll just have to wait and see!

Don't forget that you only have until January 3rd to purchase items from the Holiday Mini that aren't on the list!

Marker Layering and Outlining an Image


The image on this card was colored using the marker layering technique. Start with the lightest color you want to use and color the entire area.  Continue to add darker tones, but don't color the entire area.  Make sure you start a little lower for every color you add.  The shadow effect was created by outlining the images with River Rock.  


A Quick Thank You Card

Using the Big Shot to add texture is a great way to make a simple card look more elegant!  
To make this card, start by running the Very Vanilla card stock through the Big Shot with the Curly Label Movers and Shapers die.  Then, run the card stock through a second time with the Elegant Bouquet embossing folder.  On a small piece of Very Vanilla card stock stamp the sentiment and punch it out with the Curly Label punch.  Use the Boho Blossom punch to create the flower.  Finally, before putting the card together, run a small piece of Elegant Eggplant through the Big Shot with the Curly Label Movers and Shapers die to put behind the punched image.

Saturday, December 17, 2011

Getting Back to Blogging!

I finally found a way that I can blog from my iPad!  For all of you that know about my construction woes, my "office" is temporarily downstairs in the basement! :(  It's not my favorite place in the house, so I avoid it as much as I can.  I try to do most everything from my iPad, but I haven't been very successful with blogging. (You can't add images from the browser when using Blogger.  What good would a card post be without an image?!)  After many trials and tribulations, I finally found an app that works! So....get ready for a lot of posts from projects that I have made over the past few months!!!  I might even try making a video! :)

I am going to be posting several projects this weekend, but not all of the posts will be complete.  My goal is to get a short description and picture posted.  I will go back and add more details over Christmas break!

Have a great day!
Charlene

A Very Special Gift Bag


I recently made this gift bag at my upline's house.  I couldn't wait to share it, so we made it at our December Big Shot Club.  Isn't it just too cute!

*I don't have a good image of the gift bag.  This is just an image of the front of the gift bag.  Check back soon for more photos!


Personal Planners

One of the projects that we made during our MARATHON stamping day in November was a planner.  Have you ever wanted a place to write notes and keep reciepts?  Well, the planners do just that and they look pretty too!


Friday, December 16, 2011

New Items Added to the Clearance Rack!

Make sure you click on my online store and then go to the Clearance Rack... there are over 200 items that have been added.  They will go quick so make sure you place an online order! There are Big Shot dies on sale for $16 PLUS all of the old style punches are on sale too!!!! Stock up on the punches that you may be missing!

Wednesday, September 28, 2011

A Birthday Card from my Parents

Below is the beautiful card my parents gave me for my birthday. (My mom made it.  My dad only uses the stamps you buy at Staples that say paid in full!!!)

My mom stamped the image with Versa Mark and then used white embossing powder.  She then sponged ink over the stamped image.  This is the resist embossing technique.  Doesn't it look like an actual doily glued to the card?


Cards for Some of my Friends

Ok...so I make cards, a lot of cards....but sometimes I forget to mail them! (I think deep inside I don't want to get rid of some of them! :))  So over the weekend I worked on several cards to send to family and friends for many different reasons.  Below are just some of the cards I made.  They are simple cards because I had A LOT to make!!!

These cards were so simple to make.  All you need is a piece of designer series paper, a half sheet of card stock, ribbon, and some butterflies from the embosslit die.

The card with the doily stamp was a card that I recently made with my upline, Donna.  I wanted to make a similar card but didn't have the doily stamp, so I improvised. 


A Big Shot Club Beginning

Sorry for the delay in posting to my blog.  The beginning of school always throws me for a loop!  We recently had our first Big Shot Club meeting where all of the crafting had to do with using Big Shot products.  Below are the toucans I made for all of the members as a welcome gift.  Aren't they cute!


As promised, club members made the "quilted" cards that are below.  Aren't the color combinations nice?  Because the cards were 5 1/4" x 5 1/4", I showed everyone how to make a very simple envelope for the card.  (I will be emailing my club members specific directions tomorrow!!!)


The second project club members made was this cute little Top Note purse with gift cards.  (Club members will be making the cards during the beginning of this Friday's meeting.)  There are sooooo many things you can do with the Top Note.


Thursday, August 4, 2011

Thank You!

Ok...so don't tell my husband that I was stamping again this morning instead of painting!  I saw a new technique and I just had to try it.  It is called marker layering and I got the idea from Karen Barber, a Stampin' Up! demonstrator.  I am going to send these cards to customers who purchased from me during the month of July.  So be on the look out if you placed an order last month!

Card for the Big Shot Club

I am really getting excited for the Big Shot Club! Below is a sneak peek of a card we will be making at the first meeting. Members will get to pick the colors that they will use. The idea for the card isn't original. I CASEd it from Jill Olsen at Stampin' Up! 

Stampin' Up! will be offering a wonderful scoring tool in the upcoming Holiday Mini.  It is very easy to make envelopes with this tool.  Everyone in the club with have a chance to make an envelope for this card since we don't sell envelopes to fit 5 x 5 cards.

I used Wisteria Wonder and Elegant Eggplant for this card.  Wait until you see how easy it is to make this bow!
This card features Daffodil Delight and Basic Gray.


If you would still like to join the Big Shot Club, send me an email. I will be contacting all members soon to pick the dates for the September classes.

Tuesday, August 2, 2011

August Newsletter

During the month of August, buy three packs of Designer Series Paper and get one pack free!  If you don't want to purchase three packs but are interested in purchasing one pack, let me know.  If there are at least three or four people who want to purchase DSP, I can make the purchase and either give you some free paper or a discount on the paper.

Stampin' Up! will donate $2 to the Breast Cancer Research Foundation when you purchase this stamp set.

This is such a cute idea!  It's always nice to have gift tags on hand.

 If you haven't read about My Digital Studio please let me know.  It is a great alternative to scrapbooking!  I also use the images to create cards.

Wegman's Get Together

Well I think everyone had a great time and we didn't get kicked out of Wegman's!  Since it was a small group we were able to make two cards.

This is the first card we made because the flower needed time to dry.  This card features the stained glass technique.  The flower and leaves were cut out of Whisper White card stock and window sheets.  Crystal Effects and reinkers were used to get the stained glass effect. 

The second card was pretty simple except for the cutting!  The Whisper White card stock was embossed with the Flower Garden embossing folder.  The colored flowers were also embossed on watercolor paper and then colored with Melon Mambo, Regal Rose, and Old Olive watercolor crayons.  The "for you" sentiment is from the Elements of Style set.


Wednesday, July 20, 2011

July Newsletter


So many exciting things happen this month at Stampin' Up!  For starters, we have a beautiful new catalog!  Please let me know if you want one.  My special is still available for the month of July.  The annual convention also takes place in Salt Lake City, Utah.  I wasn't able to go this year but heard it was awesome. 

The items in the Summer Mini Catalog are still available through August 31st.  Click on the link to the right to see the catalog.  If you would like your own copy of the catalog, please let me know.

I am also preparing for my Big Shot Club which starts in September.  Click on the link to see all of the details.  I am so excited for this club.  I love the Big Shot and this is a great way to get one.  By the end of the club you will not only have a Big Shot but many supplies needed to create great projects!

Finally, believe it or not, I have to place my order for the Holiday Mini catalogs by the end of July.  If you would like me to mail you a catalog, please send me an email so I can make sure you are on my list.


A Fun Get Together

OK...So my house is still under construction, and I have to face facts that it will be under construction until the end of September!  In the mean time, I'm going to have a get together at Wegmans upstairs in the dining area on Wednesday, July 27th at 6:00 p.m.  I plan on eating while I'm there, so maybe you would like to join me.  I figure we can eat and chat from 6:00 p.m. until 7:00 p.m., and then I can share some techniques and answer any questions for those of you that are new to Stampin' Up!  I will also have a card to make that features the techniques I shared. 

Please let me know if you are interested in joining me so I can put aside enough space for everyone and have enough supplies.  I will need to know by Monday, July 25th.  Hope to see you there!

Charlene

Our Anniversary

The new Pennant Parade stamp set and punch gave me this idea, but I wound up not using the punch because the bear's arms couldn't hold enough of the pennants.  So, I decided to put hearts in his arms!  I wanted a watercolor look for the hearts, so I used the Watercolor Wonder crayons and my Aqua Painter.  The trees are from Lovely as a Tree, and the bear is from Under the Stars.  The background was sponged using Marina Mist, Bashful Blue, Always Artichoke, and Wild Wasabi.

Saturday, July 9, 2011

Thank You Cards

At my school, there are three wonderful workers who do so much to help make our school the great place that it is.  I wanted to show my appreciation, so I made these cards for them.

GRADUATION!

My son just graduated from high school.  These are the cards that I made for him and his girlfriend.  I used marker and twine to create the tassel.  The sentiment is from the Summer Mini hostess set, Swirls and Curvy Versus.


Father's Day

Below is the card I made my dad for Father's Day. He has practically every tool imaginable! I used Platinum Shimmer Paint and an Aqua Painter to paint the silver on the tools.


The beautiful brayered card is what my mom made for my husband, Mike, using the Sail Away stamp. It is a CASE from Michelle Zindorf. (I was getting ready to make my husband's Father's Day card, and he asked me if I would like to spend the afternoon sitting outside in our lounge chairs. I told him if I sat outside with him, I wouldn't have time to make his card and he said he would rather spend time with me, so I haven't made his card yet!)


Saturday, June 18, 2011

Big Shot Club Coming in September!


Would you like to own a Big Shot and a lot of Stampin' Up! merchandise, but don't want to pay for it all at once?  I am very excited to announce that beginning in September, I will be hosting a Big Shot Club!  See all of the details below:

The club will meet twice a month, and the cost will be $40 for the first meeting and $35 for the second meeting.  At the first meeting of the month, club members will select $50 worth of Stampin' Up! merchandise and make two to three Big Shot projects, depending on the details of the projects.  There will also be two hostesses at the first meeting of every month who will get to select $33 of free hostess merchandise. (Beginning on July 1st, Hostess Dollars are good on special reduced priced merchandise and/or any products in the catalog.)

At the second meeting of the month, club members will receive their Stampin' Up! merchandise, create more Big Shot projects, and the hostesses will receive their free merchandise.

Finally at the last club meeting in December, all club members will receive their Big Shot.  This meeting will be before Christmas.  Won't this be a nice gift for you!

In summary, this is what you get for a total of $300:
  • A Big Shot including standard cutting pads and the multipurpose platform valued at $99.95
  • $50 of Stampin' Up! merchandise every month totaling $200
  • $33 of Hostess merchandise
  • free shipping and tax totaling $53.10
  • 8 classes valued at $96
  • a free 2011-2012 Idea Book and Catalog (as soon as you sign up) valued at $9.95
The total value of this club is $492.00!!!

If you would like to participate in this club but already have a Big Shot, there are other products that can be selected in place of the Big Shot. (I will work out the details with you.)

Please email me if you would like to participate.  There is only room for 8 club members!  Hostesses' months will be determined by the order people sign up for the club.  Dates will be posted in August; they will be decided after discussing the availability with club members.

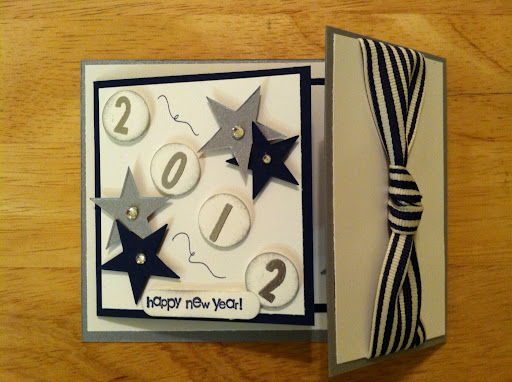
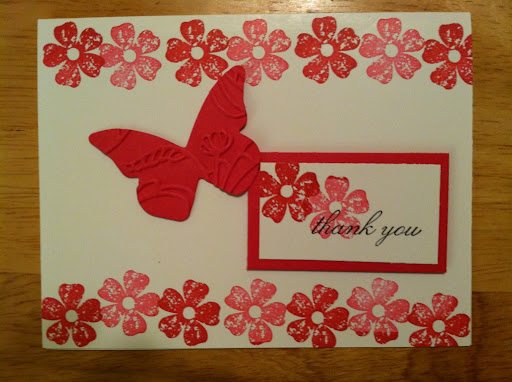
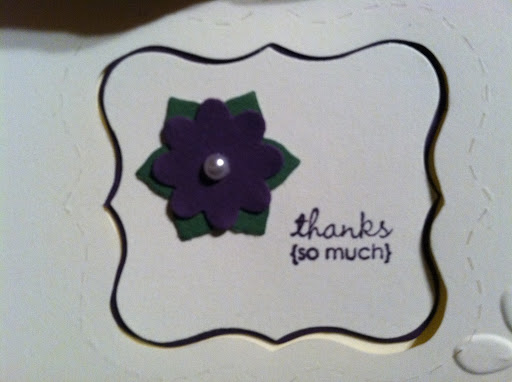
See some projects below that were created using the Big Shot.